前言
前几年实现的一个 demo 效果,今天翻出来整理下,给大家提供类似场景参考思路。
当时的需求场景是需要 3D 展示手办模型,但是因为甲方预算有限,问有没有其他青春版(性价比)方案。
刚好那段时间在处理 lottie 动画跳帧的问题,就提出了给模型拍个全身照,旋转的时候逐帧播放达到模拟手办模型旋转的动画效果。
众所周知,帧率越高,单位时间内图像帧的个数就会越多,对应动画效果就会越流畅,当然了,对应需要准备的模型素材也就越多。
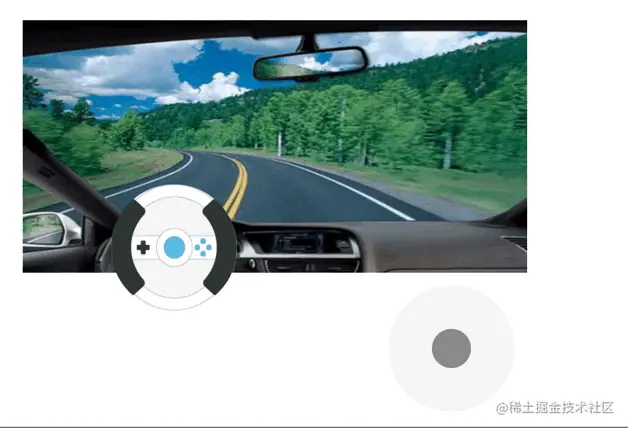
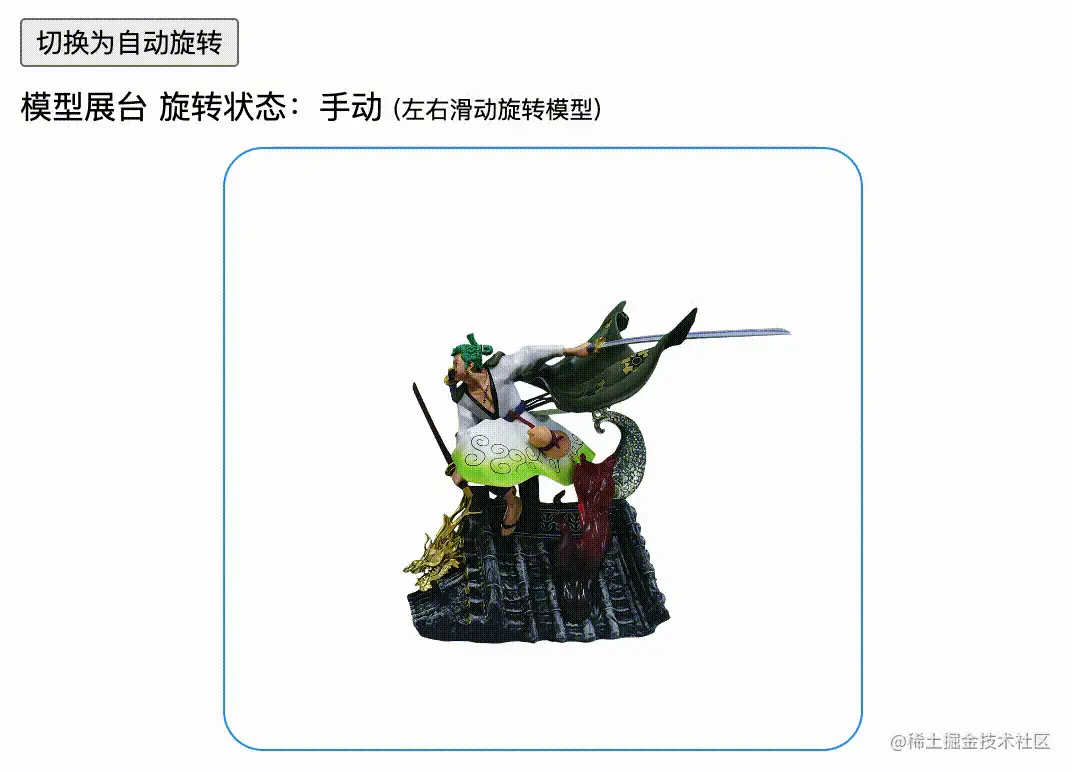
效果预览
代码片段
为了省流,这里没有预渲染图片资源,????可能出现转动太快,图片未加载的情况,请????等待片刻
style
|
1 2 3 4 5 6 7 8 9 10 11 12 13 14 15 16 17 18 19 20 21 22 23 24 25 26 27 28 29 30 |
body { padding: 24px; } .model-box { box-shadow: 0 10px 40px #00000029; padding: 24px; margin: 12px 0; border-radius: 12px; h4 { margin: 12px 0; } span { font-size: 12px; } } .content-box { position: relative; width: 318px; height: 300px; border: 1px solid #2196f3; border-radius: 20px; margin: 0 auto; img { position: absolute; top: 50%; pointer-events: none; width: 100%; transform: translateY(-50%); } } |
Script
|
1 2 3 4 5 6 7 8 9 10 11 12 13 14 15 16 17 18 19 20 21 22 23 24 25 26 27 28 29 30 31 32 33 34 35 36 37 38 39 40 41 42 43 44 45 46 47 48 49 50 51 52 53 54 55 56 57 58 59 60 61 62 63 64 65 66 67 68 69 70 71 72 73 74 75 76 77 78 79 80 81 82 83 84 85 86 87 88 89 90 91 92 93 94 95 96 97 98 99 100 101 102 103 104 105 106 107 108 109 110 111 112 113 114 115 116 117 118 119 120 121 122 123 124 125 126 127 128 129 130 131 132 133 134 135 136 137 138 139 140 141 142 143 144 |
<template> <div class="model-box"> <button @click="auto">切换为自动旋转</button> <h4>模型展台 旋转状态:{{ autoPlay ? '自动' : '手动'}} <span>(左右滑动旋转模型)</span></h4> <div class="content-box" ref="content"> <img v-for="(item, i) in modelImgs" v-show="i === activeIndex" :key="i" :src="item" /> </div> </div> </template> <script> class ModelBooth { constructor ({ el, event, total }) { this.$el = el this.$event = event this.data = { total: total, index: 0, x: 0, y: 0 } this.change = this.throttle(this.emitChange.bind(this), 50) } init () { this.addListener() } addListener () { this.$el.addEventListener('touchstart', (e) => { this.$event?.onStop() this.data.x = e.touches[0].pageX this.data.y = e.touches[0].pageY }, false) this.$el.addEventListener('touchmove', (e) => { this.$event?.onStop() const endx = e.changedTouches[0].pageX const endy = e.changedTouches[0].pageY const direction = this.calcDirection(this.data.x, this.data.y, endx, endy) switch (direction) { case 'left': e.preventDefault() this.change(false) break case 'right': e.preventDefault() this.change(true) break } }, false) } auto ({ index }) { this.data.index = index this.change(true) } throttle (fn, time){ let t1 = 0 return function () { let t2 = Date.now() if (t2 - t1 > time) { fn.apply(this, arguments) t1 = t2 } } } emitChange (type) { let nowIndex = this.data.index if (!type) { ++nowIndex } else { --nowIndex } const result = ((nowIndex % this.data.total) + this.data.total) % this.data.total this.data.index = nowIndex this.$event?.onChange(result) } calcDirection (startX, startY, endX, endY) { const angX = endX - startX const angY = endY - startY let result = '' // 消除噪音 if (Math.abs(angX) < 2 && Math.abs(angY) < 2) { return result } const baseAngle = 45 const angle = this.calcAngle(angX, angY) if (angle >= -(baseAngle * 3) && angle <= -baseAngle) { result = 'left' } else if (angle > baseAngle && angle < (baseAngle * 3)) { result = 'right' } else if ((angle >= (baseAngle * 3) && angle <= (baseAngle * 4)) || (angle >= -(baseAngle * 4) && angle < -(baseAngle * 3))) { result = 'up' } else if (angle >= -baseAngle && angle <= baseAngle) { result = 'down' } return result } calcAngle (x, y) { return Math.atan2(x, y) * 180 / Math.PI } } export default { data() { return { modelImgs: Array.from({ length: 30 }).map((v, i) => `https://hi-zhang.com/assets/zip/${i}.png`), activeIndex: 0, autoPlay: false, playTn: null } }, mounted () { this._modelBooth = new ModelBooth({ el: this.$refs.content, total: this.modelImgs.length, event: { onChange: (index) => { this.activeIndex = index }, onStop: () => { this.stop() } } }) this._modelBooth.init() }, methods: { stop () { this.autoPlay = false clearInterval(this.playTn) }, auto () { this.stop() this.autoPlay = true this.playTn = setInterval(() => { this._modelBooth.auto({ index: this.activeIndex }) }, 50) } } } </script> |
核心科技
- 搭建舞台
- 把抓拍的各个视角模型照片,渲染到舞台上,然后堆叠到一起备用
- 同时段只展示一个视角的模型照片
- 旋转时同步视角
相信大家已经知道如何去实现这个需求了,那么就再简单贴一下相关的核心问题处理
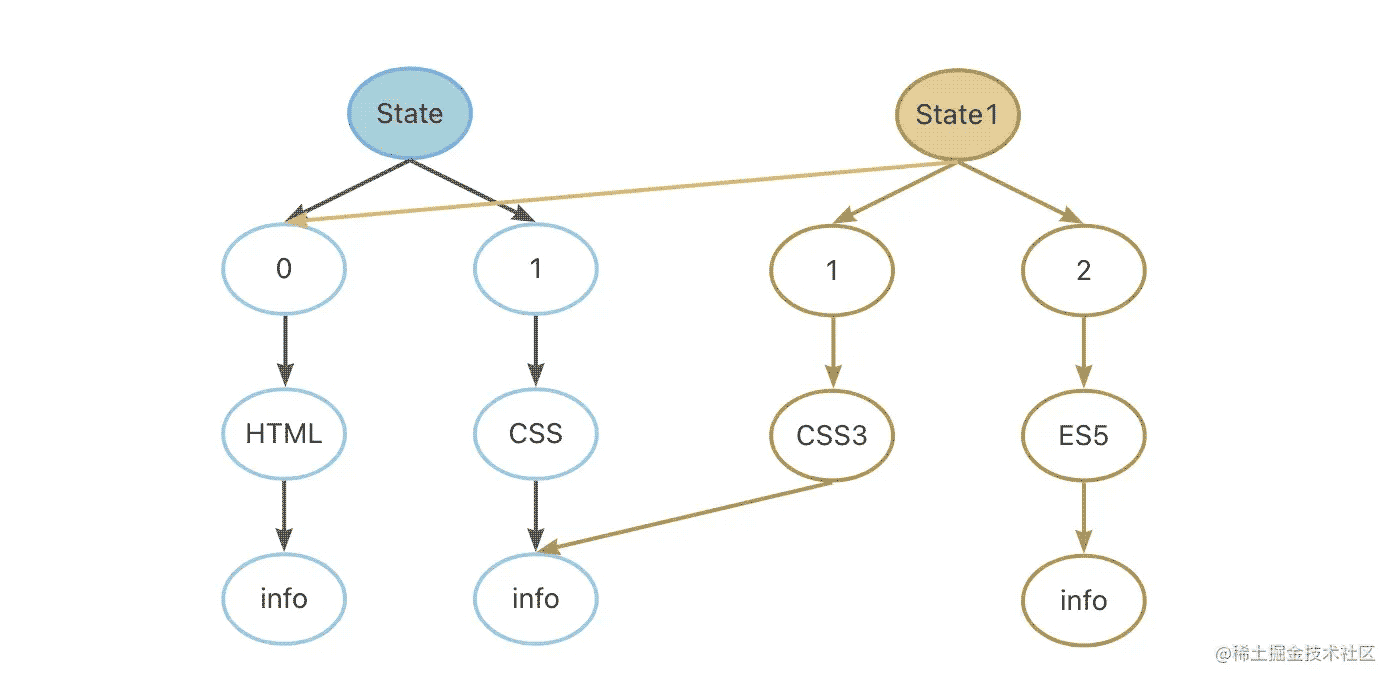
获取旋转角度
监听 touch 事件,通过开始、结束坐标计算移动方向
|
1 2 3 4 5 6 7 8 9 10 11 12 13 14 15 16 17 18 19 |
this.$el.addEventListener('touchstart', (e) => { this.data.x = e.touches[0].pageX this.data.y = e.touches[0].pageY }, false) this.$el.addEventListener('touchmove', (e) => { const endx = e.changedTouches[0].pageX const endy = e.changedTouches[0].pageY const direction = this.calcDirection(this.data.x, this.data.y, endx, endy) switch (direction) { case 'left': e.preventDefault() this.change(false) break case 'right': e.preventDefault() this.change(true) break } }, false) |
根据坐标计算移动方向
|
1 2 3 4 5 6 7 8 9 10 11 12 13 14 15 16 17 18 19 20 21 22 23 24 |
calcDirection (startX, startY, endX, endY) { const angX = endX - startX const angY = endY - startY let result = '' // 消除噪音 if (Math.abs(angX) < 2 && Math.abs(angY) < 2) { return result } const baseAngle = 45 const angle = this.calcAngle(angX, angY) if (angle >= -(baseAngle * 3) && angle <= -baseAngle) { result = 'left' } else if (angle > baseAngle && angle < (baseAngle * 3)) { result = 'right' } else if ((angle >= (baseAngle * 3) && angle <= (baseAngle * 4)) || (angle >= -(baseAngle * 4) && angle < -(baseAngle * 3))) { result = 'up' } else if (angle >= -baseAngle && angle <= baseAngle) { result = 'down' } return result } calcAngle (x, y) { return Math.atan2(x, y) * 180 / Math.PI } |
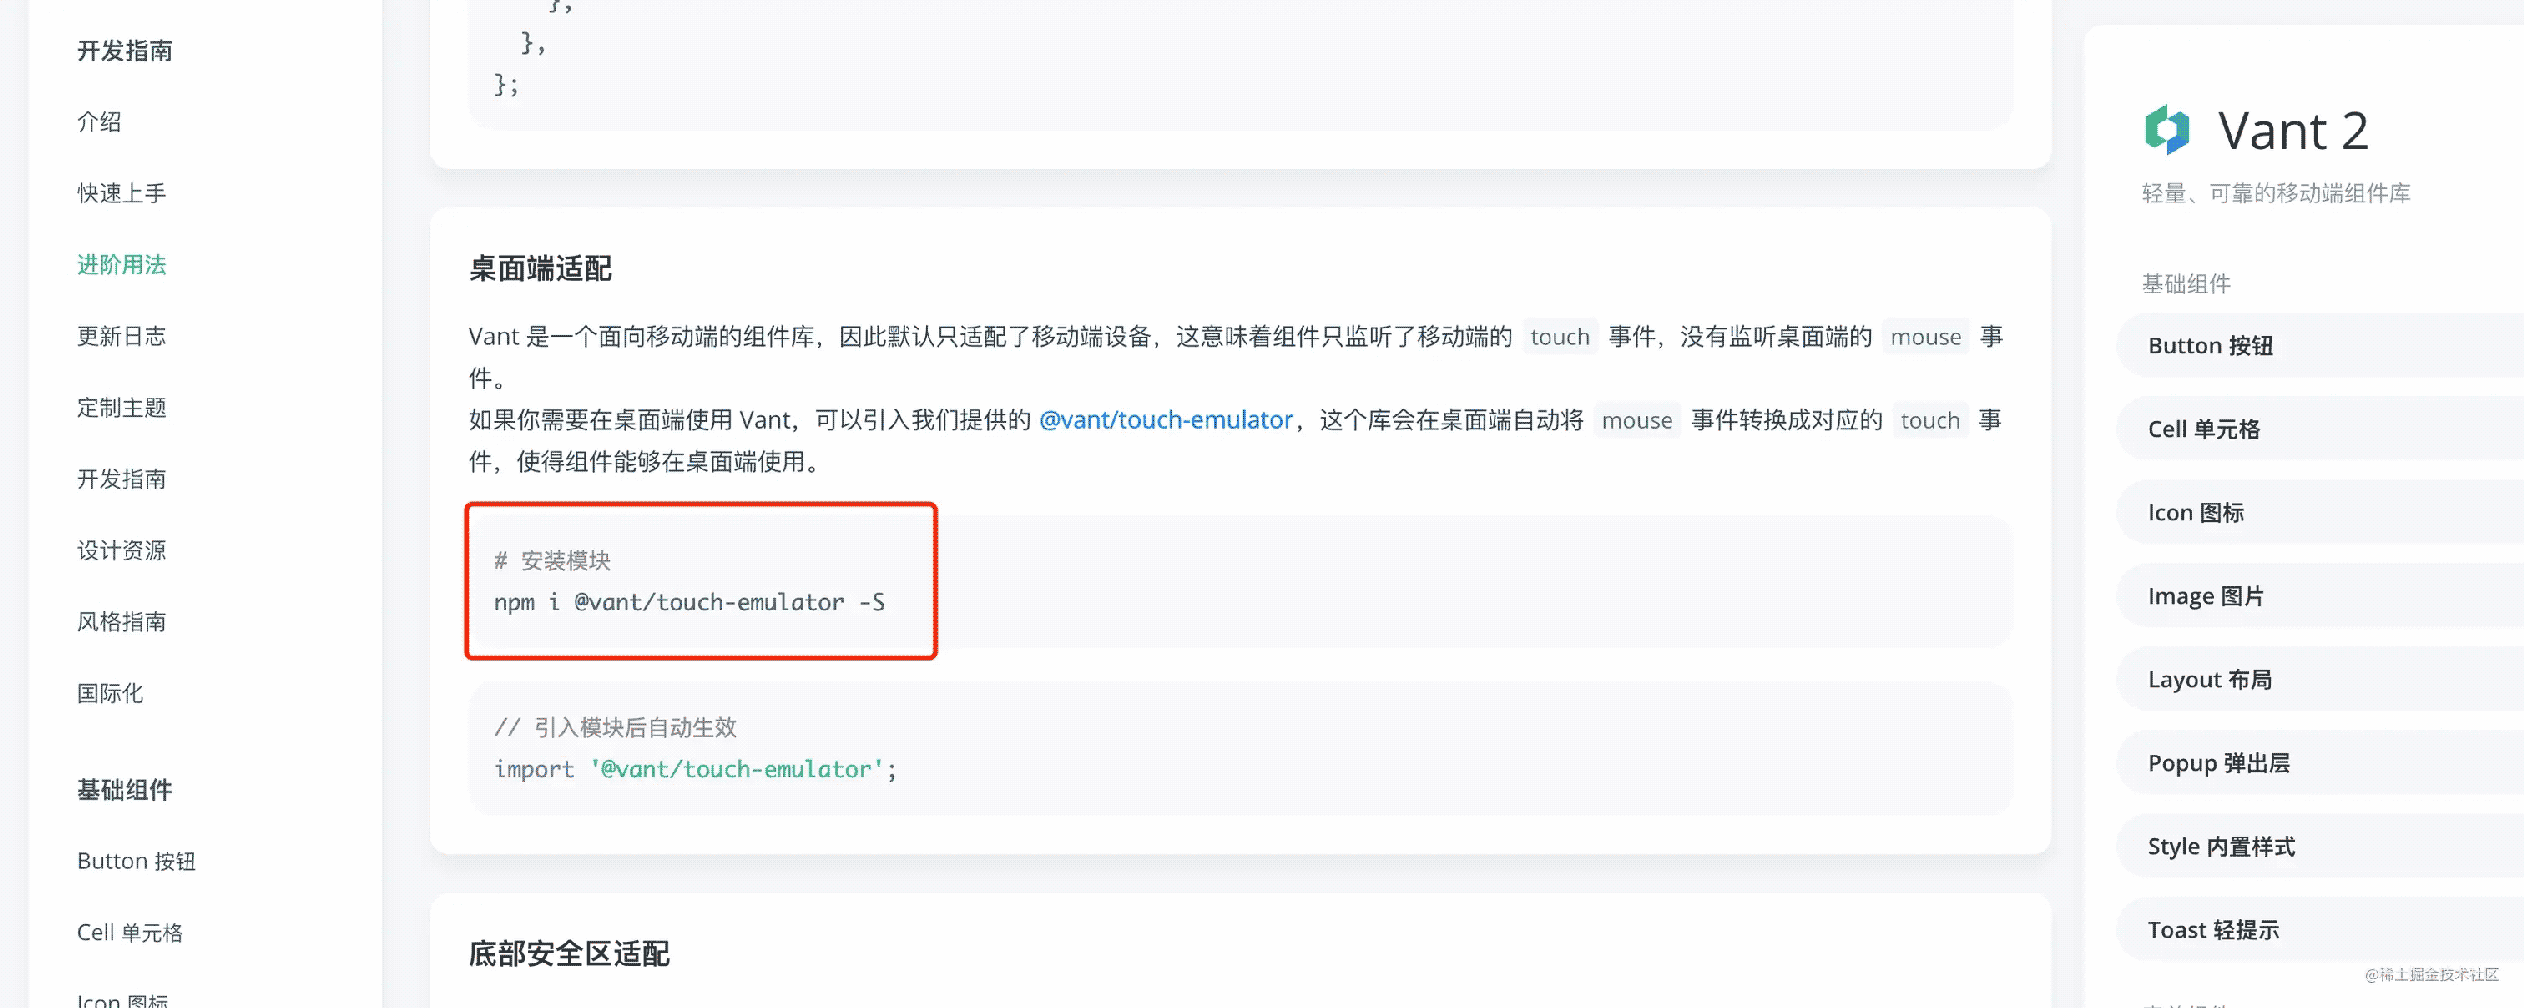
PC端支持 touch 事件
到这里你会发现PC端是不支持 touch 事件的,还好这件事不是你第一个发现的,在 VantUI 的官方示例中,有成熟的方案,相信细心的你一定注意到了。