
SpringBoot内置Tomcat启动方式

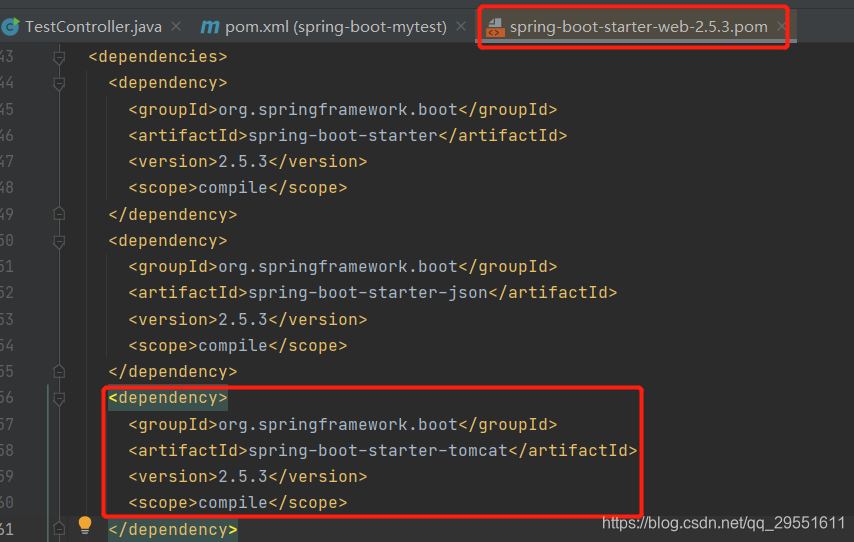
一、Tomcat相关配置类如何加载的? 在springboot项目中,我们只需要引入spring-boot-starter-web依赖,启动服务成功,我们一个web服务就搭建好了,没有明显的看到tomcat。 其实打开spring-boot-starter-web依
一、Tomcat相关配置类如何加载的?在springboot项目中,我们只需要引入spring-boot-starter-web依赖,启动服务成功,我们一个web服务就搭建好了,没有明显的看到tomcat。 其实打开spring-boot-starter-web依赖,我们可以看到:依赖了tomcat。
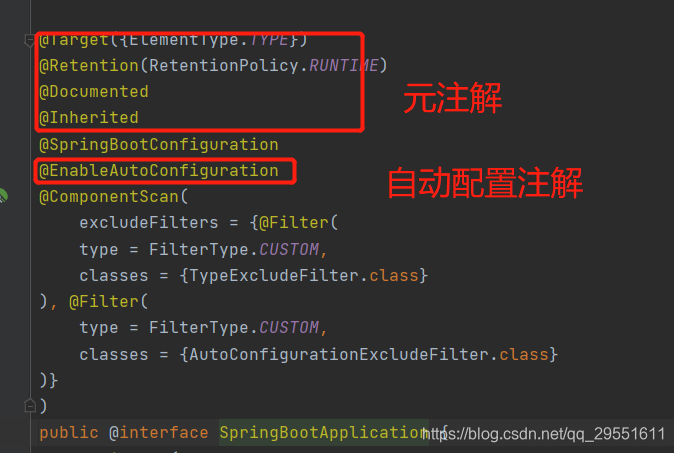
1.进入Springboot启动类我们加入Springboot最核心的注解@SpringBootApplication,源码如下图:重点看注解@EnableAutoConfiguration,
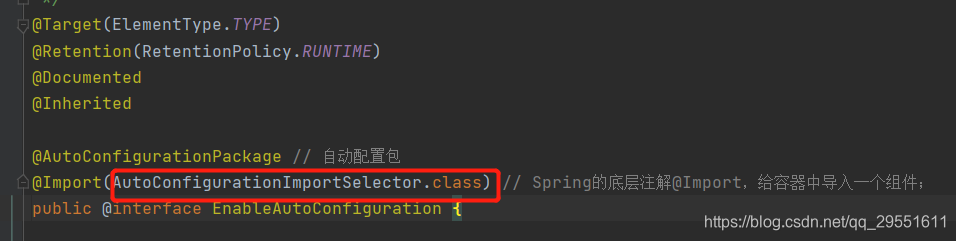
2.进入注解@EnableAutoConfiguration如下图:该注解通过@Import注解导入了AutoConfigurationImportSelector类。 其实这个类,就是导入通过加载配置文件,加载了很多工厂方法的配置类。
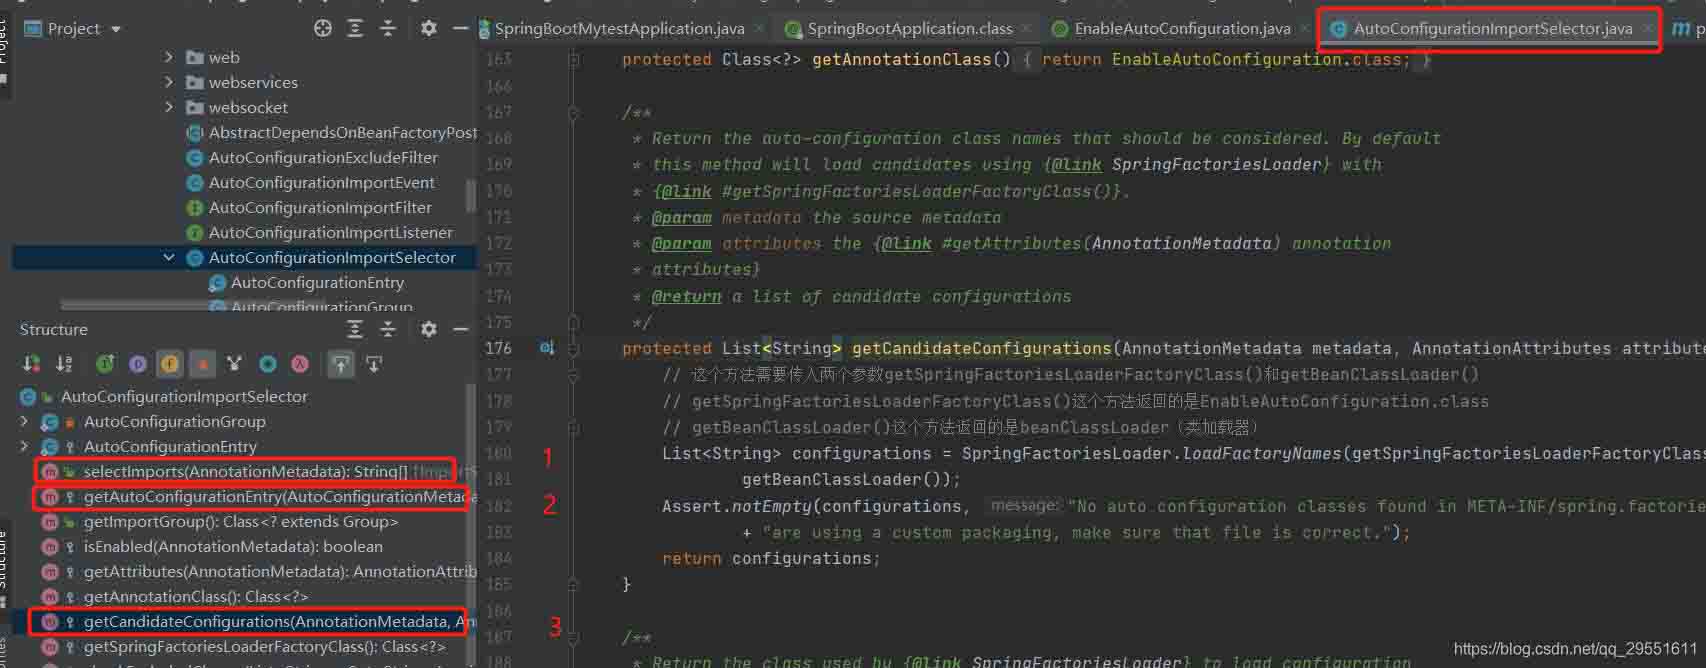
3.进入AutoConfigurationImportSelector类首先调用selectImport()方法,在该方法中调用了 getAutoConfigurationEntry()方法,在之中又调用了getCandidateConfigurations()方法, getCandidateConfigurations()方法就去META-INF/spring.factory配置文件中加载相关配置类。 详细讲解如下:也就是下图的,方法1调用方法2,方法2调用方法3:
到了这里加载了 META-INF/spring.factories文件:
4.我们看到加载了ServletWebServerFactoryAutoConfiguration这个配置类,web工厂配置类。
从这个配置工厂类,我们看出通过@Import注解加载了tomcat,jetty,undertow三个web服务器的配置类。 由于没有导入jetty和undertow的相关jar包,这两个类实例的不会真正的加载。 5.进入EmbeddedTomcat类创建了TomcatServletWebServerFactory类的对象。
6.进入TomcatServletWebServerFactory类关注getWebServer()方法:
getWebServer()方法在当前类,调用了getTomcatWebServer()方法,其实又new TomcatWebServer()对象:
7.进入TomcatWebServer类这个类才是真正的做tomcat启动的类: (1)构造方法:调用了initialize()方法
(2)进入initialize()方法,这个方法:this.tomcat.start(),启动tomcat容器了。
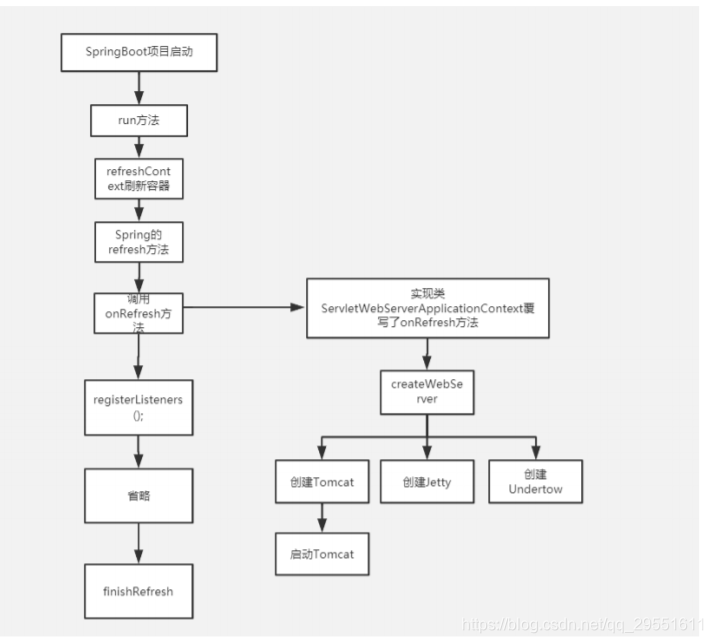
二、getWebServer()的调用分析,也就是tomcat何时启动的上面分析了tomcat的配置到启动的方法,我们现在来分析,tomcat是何时启动的。 1.首先进入SpringBoot启动类的run方法
最终调用了本类的一个同名方法:
这个方法大概做了以下几件事:
2.那么内置tomcat启动源码就是隐藏在上面第六步:refreshContext方法里面,该方法最终会调 用到AbstractApplicationContext类的refresh()方法,进入refreshContext()方法,如图:
refreshContext()调用了refresh()方法:
refresh()方法调用了this.onRefresh():
如下面的代码:createWebServer() 方法调用了一个factory.getWebServer()。
到了这里getWebServer()方法,下一步就是创建TomcatWebServer对象,创建该对象,就在构造方法启动了Tomcat。详细代码在第一部分有。 总结tomcat启动流程
|

您可能感兴趣的文章 :

-
Java-URLDecoder、URLEncoder使用及说明介绍
前言 Java中的URLDecoder和URLEncoder是用于对URL进行编码和解码的类。 URL编码是将URL中的特殊字符转换成特定的格式,以便于在URL中传递参数。 -
SpringBoot内置Tomcat启动方式
一、Tomcat相关配置类如何加载的? 在springboot项目中,我们只需要引入spring-boot-starter-web依赖,启动服务成功,我们一个web服务就搭建好了, -
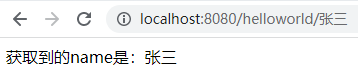
Springboot接收Get参数实践过程
一、参数直接在路径中 1.假设请求地址是如下这种 RESTful 风格 hangge 这个参数值直接放在路径里面: http://localhost:8080/helloworld/张三 1 2 3 4 5 -
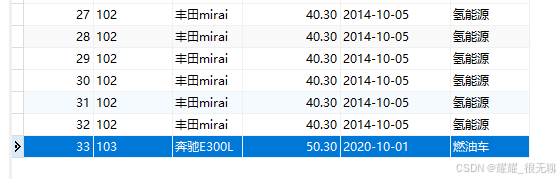
MyBatis中的N+1问题的解决方法
N+1 问题是指在进行一对多查询时,应用程序首先执行一条查询语句获取结果集(即 +1),然后针对每一条结果,再执行 N 条额外的查询语句 -
MyBatis中 #{} 和 ${} 的区别介绍
在MyBatis中,#{}和${}是两种常见的占位符,它们的作用和使用场景有所不同。理解它们的区别对于正确使用MyBatis非常重要。 在Mybatis面试中常 -
MyBatis实现CRUD的代码
准备工作 创建module(Maven的普通Java模块):mybatis-002-crud pom.xml 打包方式jar 依赖: mybatis依赖 mysql驱动依赖 junit依赖 logback依赖 mybatis-config -
Java中的字节流和字符流介绍
Java 中的输入输出(I/O)流主要分为字节流和字符流。这两类流为开发者提供了高效的文件读写方式,也解决了不同编码格式下的字符处理问 -
Java中缓冲流的使用与性能提升(让文件操作更高效
在Java的I/O操作中,文件读写是常见且频繁的任务。特别是对于大文件或需要频繁访问文件的程序,如何提升I/O性能成为了一个重要的问题。 -
Java中如何自定义一个类加载器加载自己指定的类
在 Java 中,类加载器(ClassLoader)负责把字节码文件(.class 文件)加载到 JVM 中,Java 的类加载机制给我们提供了高度的灵活性。通常情况下


-
Java对象创建的过程及内存布局的介绍
2021-06-05
-
Java基础学习之集合底层原理的介绍
2021-05-27
-
java实现PDF转HTML文档的示例代码
2021-05-26
-
记录Java Log的几种方式
2021-06-05
-
springboot整合RabbitMQ发送短信的实现
2021-05-16

