umi默认约定在/src/pages添加的(j|t)sx?文件会自动加载为路由。同样我们希望实现在某个目录下添加的markdown文件自动加载成为路由直接访问,本章我们首先来实现路由自动解析及页面展示的功能。
- 约定/docs目录为markdown解析目录
- 添加路由解析插件,
- 解析/docs目录下文件为路由
- 通过自动解析的路由访问页面
本节完整代码可参考 domi/feature/routes
添加路由加载插件
我们约定在项目根目录下/docs目录为markdown自动加载目录,先创建这个目录
|
1 |
mkdir /docs |
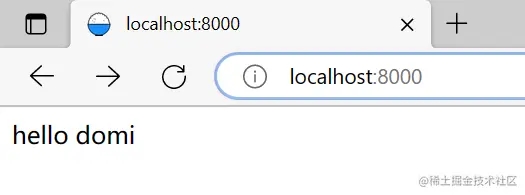
在刚创建的/docs目录下添加两个组件,用于验证解析效果
|
1 2 3 4 5 6 |
// /docs/index.tsx import react from 'react' const Home = () => { return (<div>hello domi</div>) } export default Home |
|
1 2 3 4 5 6 |
// /docs/button/index.tsx import react from 'react' const Button = () => { return <button>Button</button> } export default Button |
接下来创建路由解析插件,插件我们统一放在/src/features目录下
|
1 2 3 4 |
# 创建插件目录 mkdir /src/features # /docs目录路由解析插件 touch /src/features/routes.ts |
接下来将插件注册到配置.umirc.ts中
|
1 2 3 4 5 6 |
import { defineConfig } from "umi"; export default defineConfig({ plugins: [ './src/features/routes.ts', ], }); |
modifyRoutes
umi提供了modifyRouteshook,通过这个钩子我们可以自由修改umi的路由,文档可参考插件 API | UmiJS。
该函数入参为umi当前收集到的路由集合,返回值于入参一致,我们可以通过改变返回值来修改umi的路由。
通过打印入参,我们可以看到初始化项目默认的路由为以下结构:
|
1 2 3 4 5 6 7 8 9 10 11 12 13 14 15 16 17 18 19 20 21 22 23 24 |
{ index: { path: '/', id: 'index', parentId: '@@/global-layout', file: 'index.tsx', absPath: '/' }, docs: { path: 'docs', id: 'docs', parentId: '@@/global-layout', file: 'docs.tsx', absPath: '/docs' }, '@@/global-layout': { id: '@@/global-layout', path: '/', file: 'D:/project/domi/src/layouts/index.tsx', parentId: undefined, absPath: '/', isLayout: true } } |
这里有几个关键的属性:
- isLayout属性表示该对象是否为布局,umi的路由对象有两种形式,一种为页面,另一种为布局,通过该属性值区分。
- parentId则标注该页面使用到了哪个布局。
- path表示页面的访问路径
- file表示该对象的组件文件路径,相对路径默认会在/src/pages中找
由于我们要自己来生成markdown专属路由,用不到umi默认提供的约定路由特性,所以我们不会在/src/pages中写页面代码,这个目录我们可以删掉。
解析生成路由
我们需要在modifyRoutes钩子函数中,根据/docs目录下的文件来创建对应的路由,代码如下所示
|
1 2 3 4 5 6 7 8 9 10 11 12 13 14 15 16 17 18 19 20 21 22 |
// /src/features/routes.ts import path from 'path'; import type { IApi } from 'umi'; import type { IRoute } from '@umijs/core/dist/types'; import { getConventionRoutes } from '@umijs/core'; export default (api: IApi) => { api.describe({ key: 'domi:routes' }); api.modifyRoutes((oRoutes: Record<string, IRoute>) => { const routes: Record<string, IRoute> = {} const docDir = 'docs' // 获取某个目录下所有可以配置成umi约定路由的文件 const dirRoutes: Record<string, IRoute> = getConventionRoutes({ base: path.join(api.cwd, docDir), }); Object.entries(dirRoutes).forEach(([key, route]) => { // 这里将文件的路径改为绝对路径,否则umi会默认找/src/pages下组件 route.file = path.resolve(docDir, route.file); routes[route.id] = route; }); return routes; }); }; |
注意:如果用pnpm来安装依赖,上面代码的imoprt可能找不到依赖,需要在.npmrc中添加一行node-linker=hoisted,并从新pnpm install,将依赖扁平化处理。
getConventionRoutes
这里用到了一个umi内置的函数getConventionRoutes,该函数可以将某个目录下符合umi定义的约定路由的文件,转换成为路由对象
前面我们已经在/docs下创建了两个测试文件,将其打印出来dirRoutes变量为:
|
1 2 3 4 5 6 7 8 9 10 11 12 13 14 15 16 |
{ 'button/index': { path: 'button', id: 'button/index', parentId: undefined, file: 'button/index.tsx', absPath: '/button' }, index: { path: '/', id: 'index', parentId: undefined, file: 'index.tsx', absPath: '/' } } |
从打印结果可以看到,getConventionRoutes函数已经帮我们将/docs目录下的文件解析出来。我们只需要处理以下文件路径,即可使用。
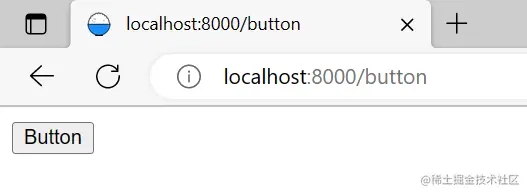
访问运行
运行项目可以看到我们能正常访问到/和/button下的两个页面,到这里我们就成功实现了路由加载。到这一步我们其实和umi提供的约定式路由功能差不多,只不过umi是在/src/pages下写页面,我们这里是在/docs下写页面。
现在切换页面需要我们手动输入地址比较麻烦,下一节我们来实现一个全局Layout布局组件,将导航放在这个组件中。