一、测试环境准备
| 节点1 | 节点2 | |
|---|---|---|
| IP地址 | 192.168.101.77 | 192.168.101.79 |
| MySQL版本 | 8.0.32 | 8.0.32 |
二、主从搭建
1.创建复制用户
节点1执行:
|
1 2 3 4 |
mysql> CREATE USER 'repl'@'%' IDENTIFIED BY '123123'; mysql> GRANT REPLICATION SLAVE ON *.* TO 'repl'@'%'; mysql> FLUSH PRIVILEGES; mysql> show master status; |
2.创建复制关系
节点2执行
|
1 2 3 4 5 6 7 |
mysql> change master to master_host='192.168.101.77', MASTER_PORT=3306, master_user='repl', master_password='123123' , MASTER_AUTO_POSITION=1; |
3.开启复制,确认复制是否成功
|
1 2 3 4 5 6 7 8 9 10 11 12 13 14 15 16 17 18 19 20 21 22 23 24 25 26 27 28 29 30 31 32 33 34 35 36 37 38 39 40 41 42 43 44 45 46 47 48 49 50 51 52 53 54 55 56 57 58 59 60 61 62 63 64 65 66 67 68 |
开启复制 mysql> start slave; 查看复制状态(下面是正常状态) root@localhost:(none)>show slave status \G *************************** 1. row *************************** Slave_IO_State: Waiting for source to send event Master_Host: 192.168.101.77 Master_User: repl Master_Port: 3306 Connect_Retry: 60 Master_Log_File: mysql-bin.000007 Read_Master_Log_Pos: 197 Relay_Log_File: localhost-relay-bin.000004 Relay_Log_Pos: 413 Relay_Master_Log_File: mysql-bin.000007 Slave_IO_Running: Yes Slave_SQL_Running: Yes Replicate_Do_DB: Replicate_Ignore_DB: Replicate_Do_Table: Replicate_Ignore_Table: Replicate_Wild_Do_Table: Replicate_Wild_Ignore_Table: Last_Errno: 0 Last_Error: Skip_Counter: 0 Exec_Master_Log_Pos: 197 Relay_Log_Space: 2098 Until_Condition: None Until_Log_File: Until_Log_Pos: 0 Master_SSL_Allowed: No Master_SSL_CA_File: Master_SSL_CA_Path: Master_SSL_Cert: Master_SSL_Cipher: Master_SSL_Key: Seconds_Behind_Master: 0 Master_SSL_Verify_Server_Cert: No Last_IO_Errno: 0 Last_IO_Error: Last_SQL_Errno: 0 Last_SQL_Error: Replicate_Ignore_Server_Ids: Master_Server_Id: 1 Master_UUID: f6ca767b-2144-11ee-80e4-080027a4fdbc Master_Info_File: mysql.slave_master_info SQL_Delay: 0 SQL_Remaining_Delay: NULL Slave_SQL_Running_State: Replica has read all relay log; waiting for more updates Master_Retry_Count: 86400 Master_Bind: Last_IO_Error_Timestamp: Last_SQL_Error_Timestamp: Master_SSL_Crl: Master_SSL_Crlpath: Retrieved_Gtid_Set: f6ca767b-2144-11ee-80e4-080027a4fdbc:4-8 Executed_Gtid_Set: f6ca767b-2144-11ee-80e4-080027a4fdbc:1-8 Auto_Position: 1 Replicate_Rewrite_DB: Channel_Name: Master_TLS_Version: Master_public_key_path: Get_master_public_key: 0 Network_Namespace: 1 row in set, 1 warning (0.00 sec)
可在节点1插入数据,然后在节点2查询数据是否同步,确定同步是否正常。 |
4.同步排错
报错1:
|
1 |
Last_IO_Error: error connecting to master 'repl@192.168.101.77:3306' - retry-time: 60 retries: 21 message: Authentication plugin 'caching_sha2_password' reported error: Authentication requires secure connection. |
解决方法:
|
1 |
ALTER USER 'repl'@'%' IDENTIFIED WITH mysql_native_password BY '123123'; |
报错2:
|
1 |
Last_IO_Error: Got fatal error 1236 from master when reading data from binary log: 'Cannot replicate because the master purged required binary logs. Replicate the missing transactions from elsewhere, or provision a new slave from backup. Consider increasing the master's binary log expiration period. The GTID set sent by the slave is '75433121-6a95-11ef-8b71-080027123ed0:1-3', and the missing transactions are 'f6ca767b-2144-11ee-80e4-080027a4fdbc:1-3'' |
解决方法:
|
1 2 3 4 5 6 7 8 9 10 11 12 13 14 |
root@localhost:(none)>stop slave; Query OK, 0 rows affected, 1 warning (0.11 sec)
root@localhost:(none)>reset master; Query OK, 0 rows affected (0.10 sec)
root@localhost:(none)>reset slave; Query OK, 0 rows affected, 1 warning (0.20 sec)
root@localhost:(none)>set @@GLOBAL.GTID_PURGED='f6ca767b-2144-11ee-80e4-080027a4fdbc:1-3'; Query OK, 0 rows affected (0.06 sec)
root@localhost:(none)>start slave; Query OK, 0 rows affected, 1 warning (0.10 sec) |
三、双主配置
双主配置也就是将上面的主从操作反向操作一遍。
1.创建复制用户
|
1 2 3 4 |
mysql> CREATE USER 'repl1'@'%' IDENTIFIED BY '123123'; mysql> GRANT REPLICATION SLAVE ON *.* TO 'repl1'@'%'; mysql> FLUSH PRIVILEGES; mysql> show master status; |
2.创建复制关系
|
1 2 3 4 5 6 7 |
mysql> change master to master_host='192.168.101.79', MASTER_PORT=3306, master_user='repl', master_password='123123' , MASTER_AUTO_POSITION=1; |
3.开启复制,确认复制是否成功
|
1 2 |
mysql> start slave; mysql>show slave status \G; |
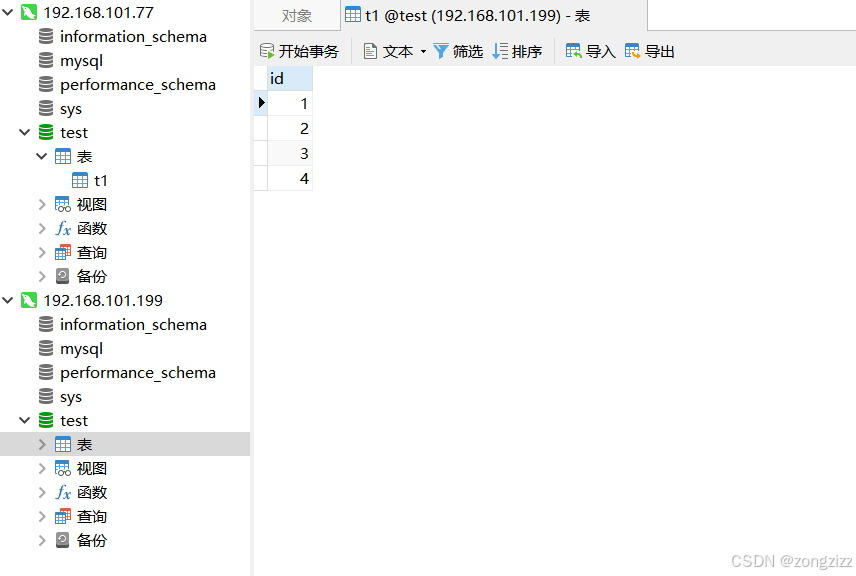
4.双主测试
节点1插入数据,节点2查询
节点2插入数据,节点1查询
四、keepalived配置
1.keepalived安装、启停操作
|
1 2 3 4 |
yum -y install keepalived systemctl status keepalived systemctl start keepalived systemctl stop keepalived |
2.keepalived配置文件
|
1 2 3 4 5 6 7 8 9 10 11 12 13 14 15 16 17 18 19 20 21 22 23 24 25 26 27 28 29 30 31 32 33 |
vi /etc/keepalived/keepalived.conf ! Configuration File for keepalived global_defs { notification_email { acassen@firewall.loc failover@firewall.loc sysadmin@firewall.loc } notification_email_from Alexandre.Cassen@firewall.loc router_id MYCAT_HA # 定义名称 } vrrp_script chk_mycat_alive { script "/etc/keepalived/mysql_check.sh" # 返回状态码为0表示正常,检测脚本为true;返回状态码非0表示异常,检测脚本为false interval 2 # 检测脚本执行的间隔,单位是秒 weight 20 } vrrp_instance VI_1 { state MASTER #主节点为MASTER,备节点为BACKUP interface enp0s3 #根据实际网卡名配置 virtual_router_id 88 priority 100 advert_int 1 authentication { auth_type PASS auth_pass qwert } track_script { chk_mycat_alive # 调用检测脚本 } virtual_ipaddress { 192.168.101.199/24 # 定义虚拟ip(VIP) } } |
3.keepalived配置文件
服务状态检查脚本
|
1 2 3 4 5 6 7 8 9 10 11 |
cat /etc/keepalived/mysql_check.sh #!/bin/bash count=`ps -C mysqld --no-heading|wc -l` time=$(date "+%Y-%m-%d %H:%M:%S") if [ $count = 0 ]; then echo "$time : count=$count, mysql is not running..." >> /var/log/keepalived_check.log exit 1 # 返回1说明脚本非正常执行,mysql不在运行中 else echo "$time : count=$count, mysql is running..." >> /var/log/keepalived_check.log exit 0 # 返回0说明脚本正常执行,mysql正在运行中 fi |
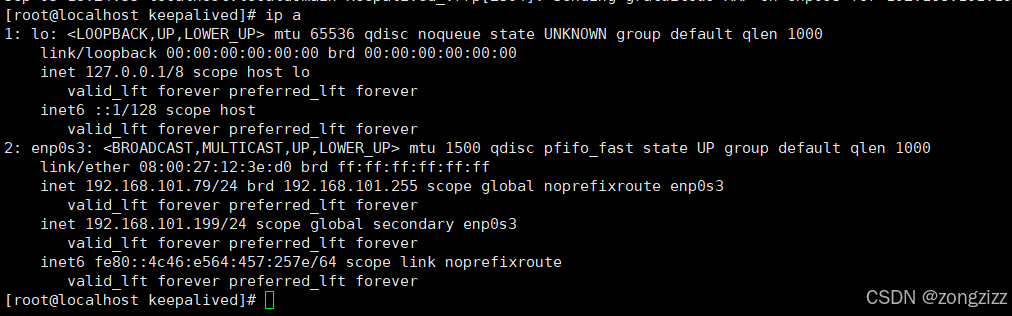
4.keepalived配置成功
配置完成后可在其中一节点上看到虚拟地址,同网段也可以ping通虚拟地址,同时也可以通过虚拟地址连接上数据库。
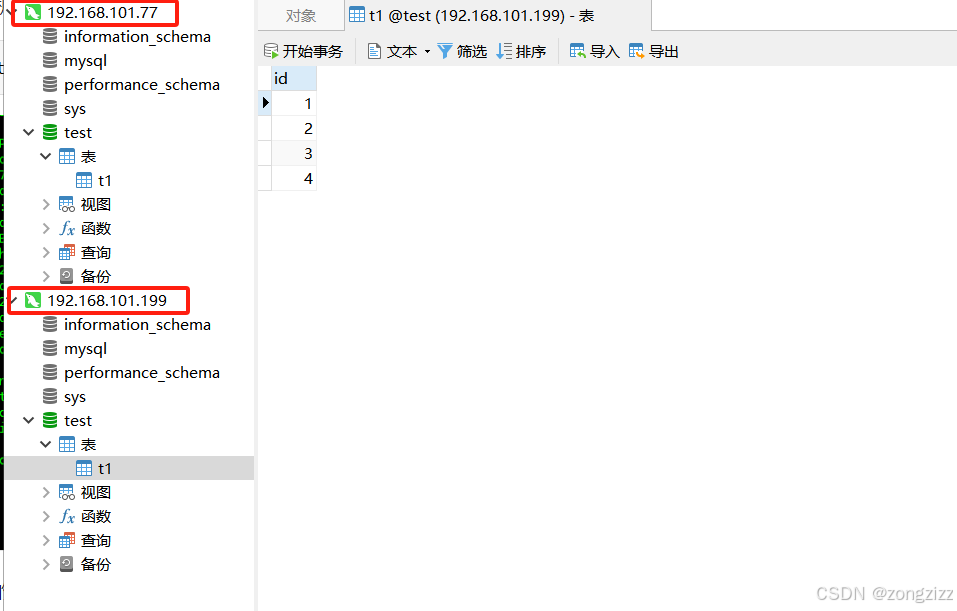
五、集群状态测试
两节点物理地址均可连接数据库,也可通过虚拟地址连接数据库,下面我们测试一下关闭一台服务器(虚拟地址所服务器)测试是否还是可通过虚拟地址连接数据库。
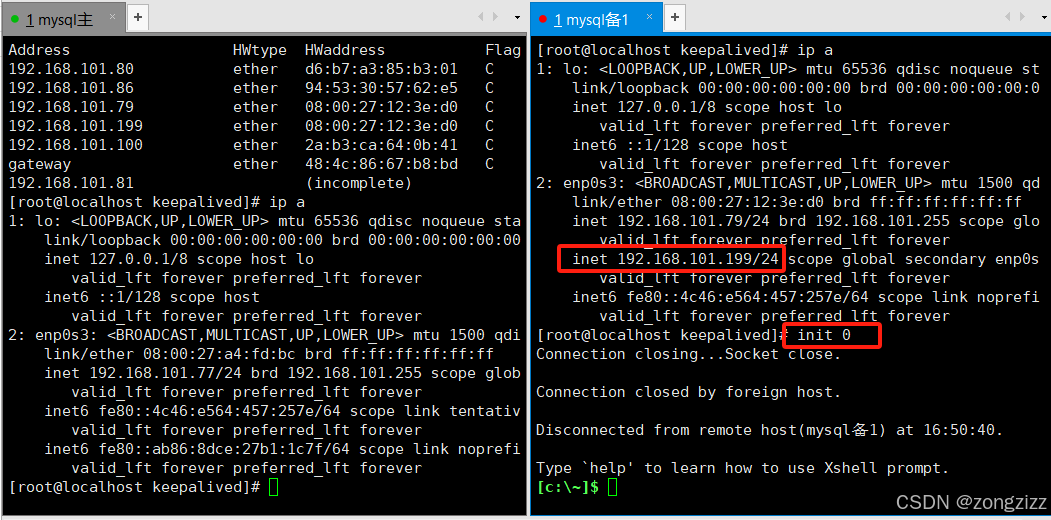
节点2关机后虚拟地址跑到节点1上去了,测试用虚拟地址连接数据库依然可以连接

重新启动节点2后,启动数据库即可拉起双主集群